內容目錄
前言
為了使用者方便
在目前的各大網站的註冊流程中
通常除了最基礎的註冊新帳號以外
也會提供第三方登入
比如說 google 登入、facebook 登入,甚至 github 登入等等
這樣的好處是可以讓使用者不須要額外註冊一個新帳號
而是可以直接使用現有的第三方帳號
即可達到註冊登入
達到快速轉換、降低門檻的效果
本文就是要來介紹如何使用 Google OAauth 來實現第三方登入
流程簡介
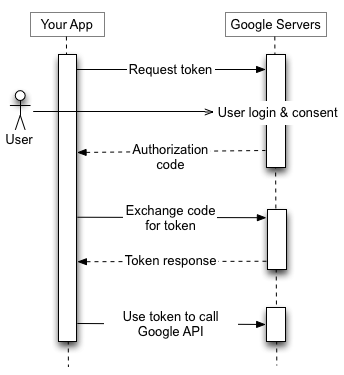
(來源: Google)
-
自 Google API Console 取得 Google OAuth 2.0 憑證
-
自 Google Authorization Server 取得 access token
(圖中 Request token + User login & consent + Authorization code) -
檢查使用者願意提供的資料範圍是否正確
(圖中 Exchange code for token + Token response) -
送 access token 給 Google API,驗證正確後回傳使用者資料給我方 App 使用
(圖中 Use token to call Google API)
流程細節
設定 Google Credentiails
step 1
進入 自 Google API Console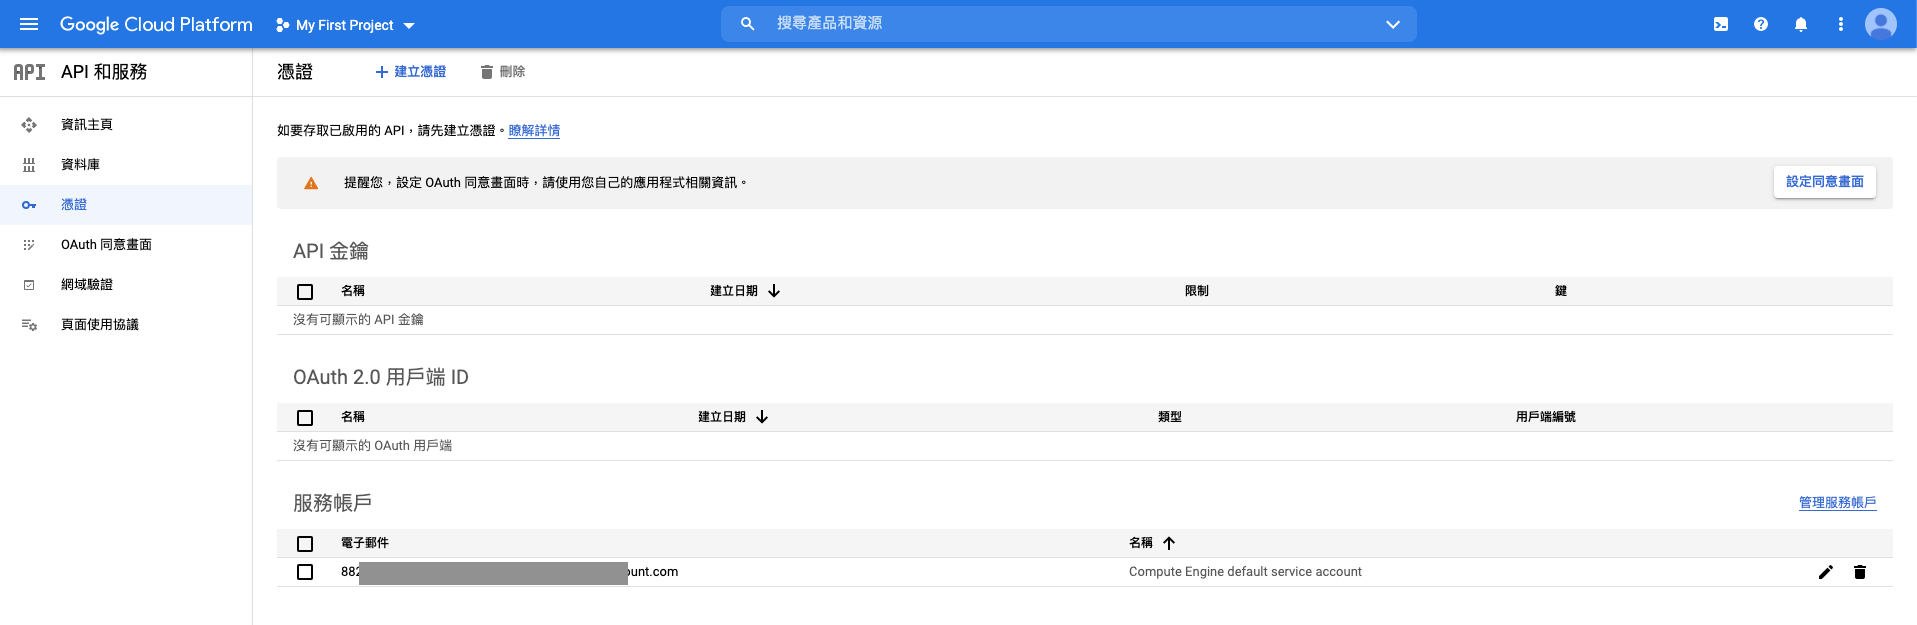
step 2
點選 建立憑證 → OAuth 用戶端 ID
step 3
設定同意畫面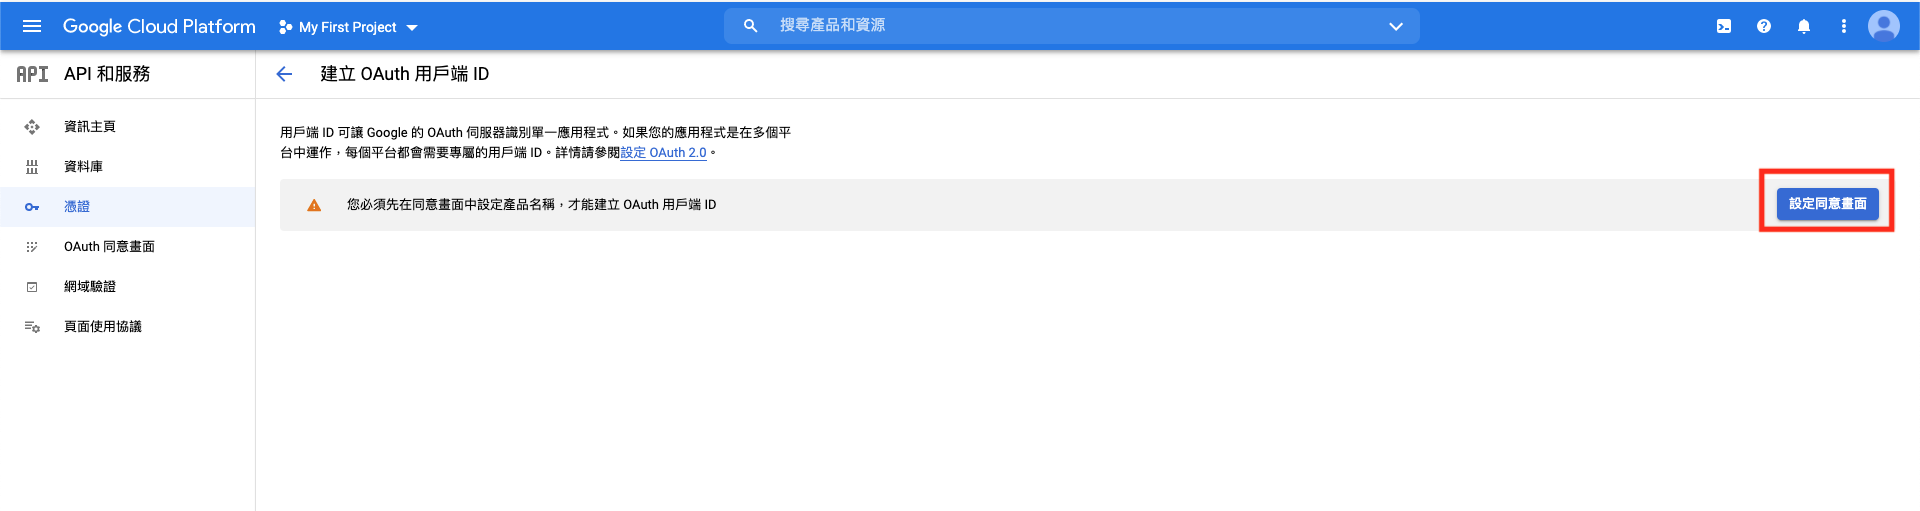
step 4
點選外部
step 5
輸入相關資訊標示星星都要填入
比較須要注意的是
已授權的重新導向 URI這邊要填入在取得 OAuth access token 後的 callback 網址
以我的例子為例
在取得 token 後是要進入註冊的流程
所以在這邊會填入
/google_next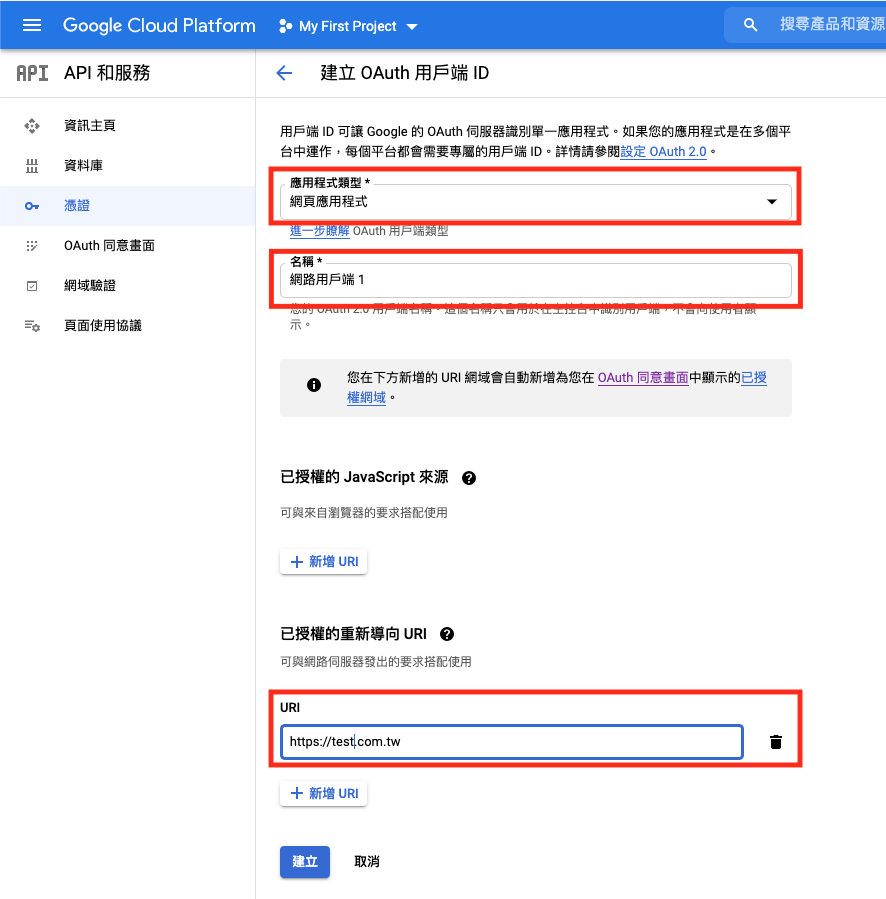
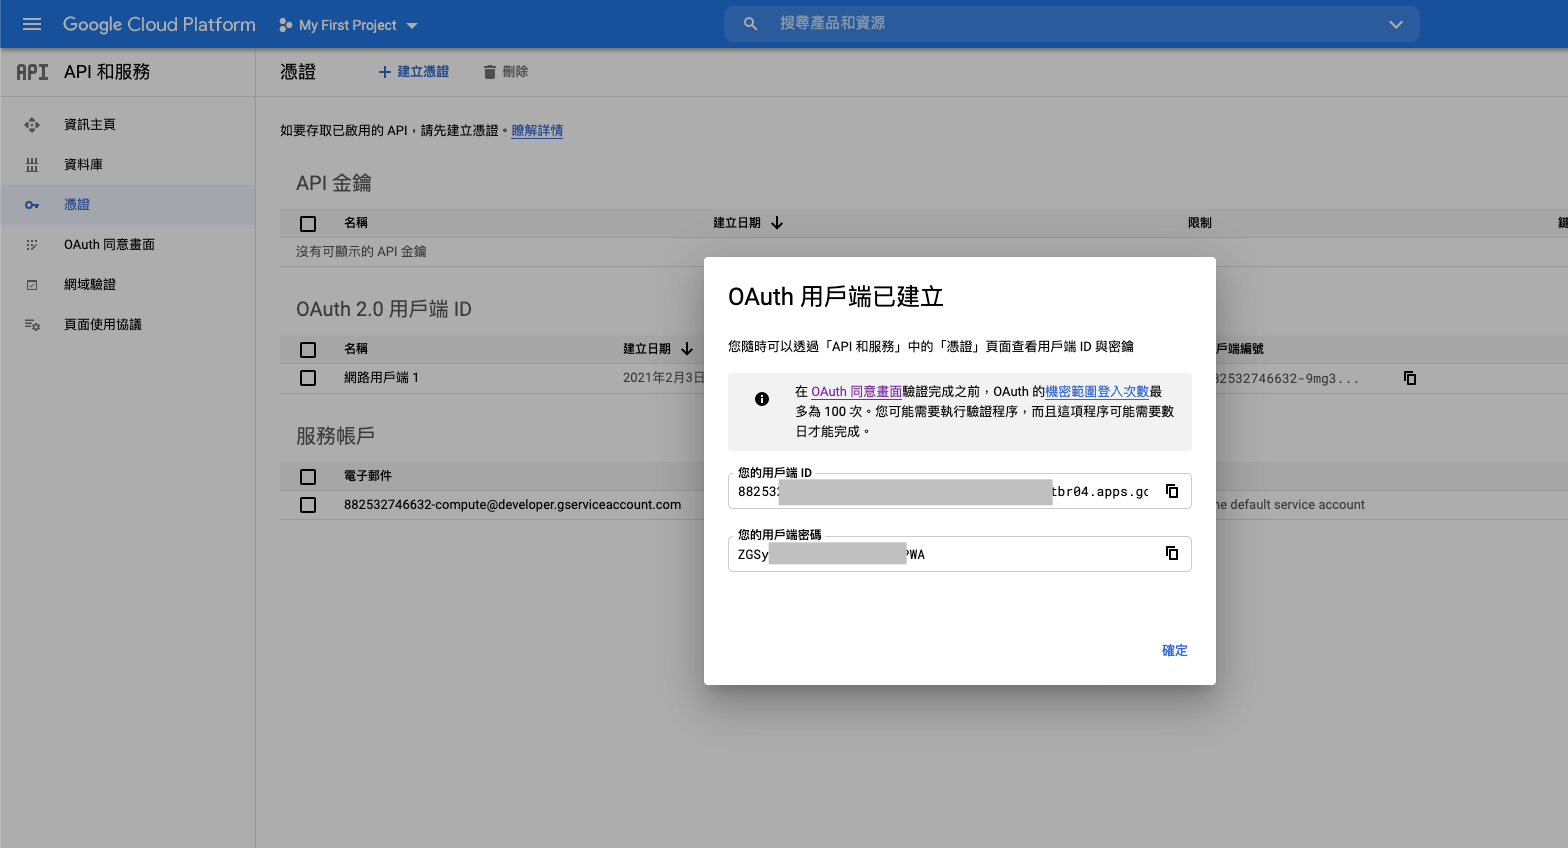
step 6
確認 OAuth 用戶端已建立這邊 show 出來的就是你的 ID 和密碼
待會我們會把這筆資料的 json 檔下載下來用
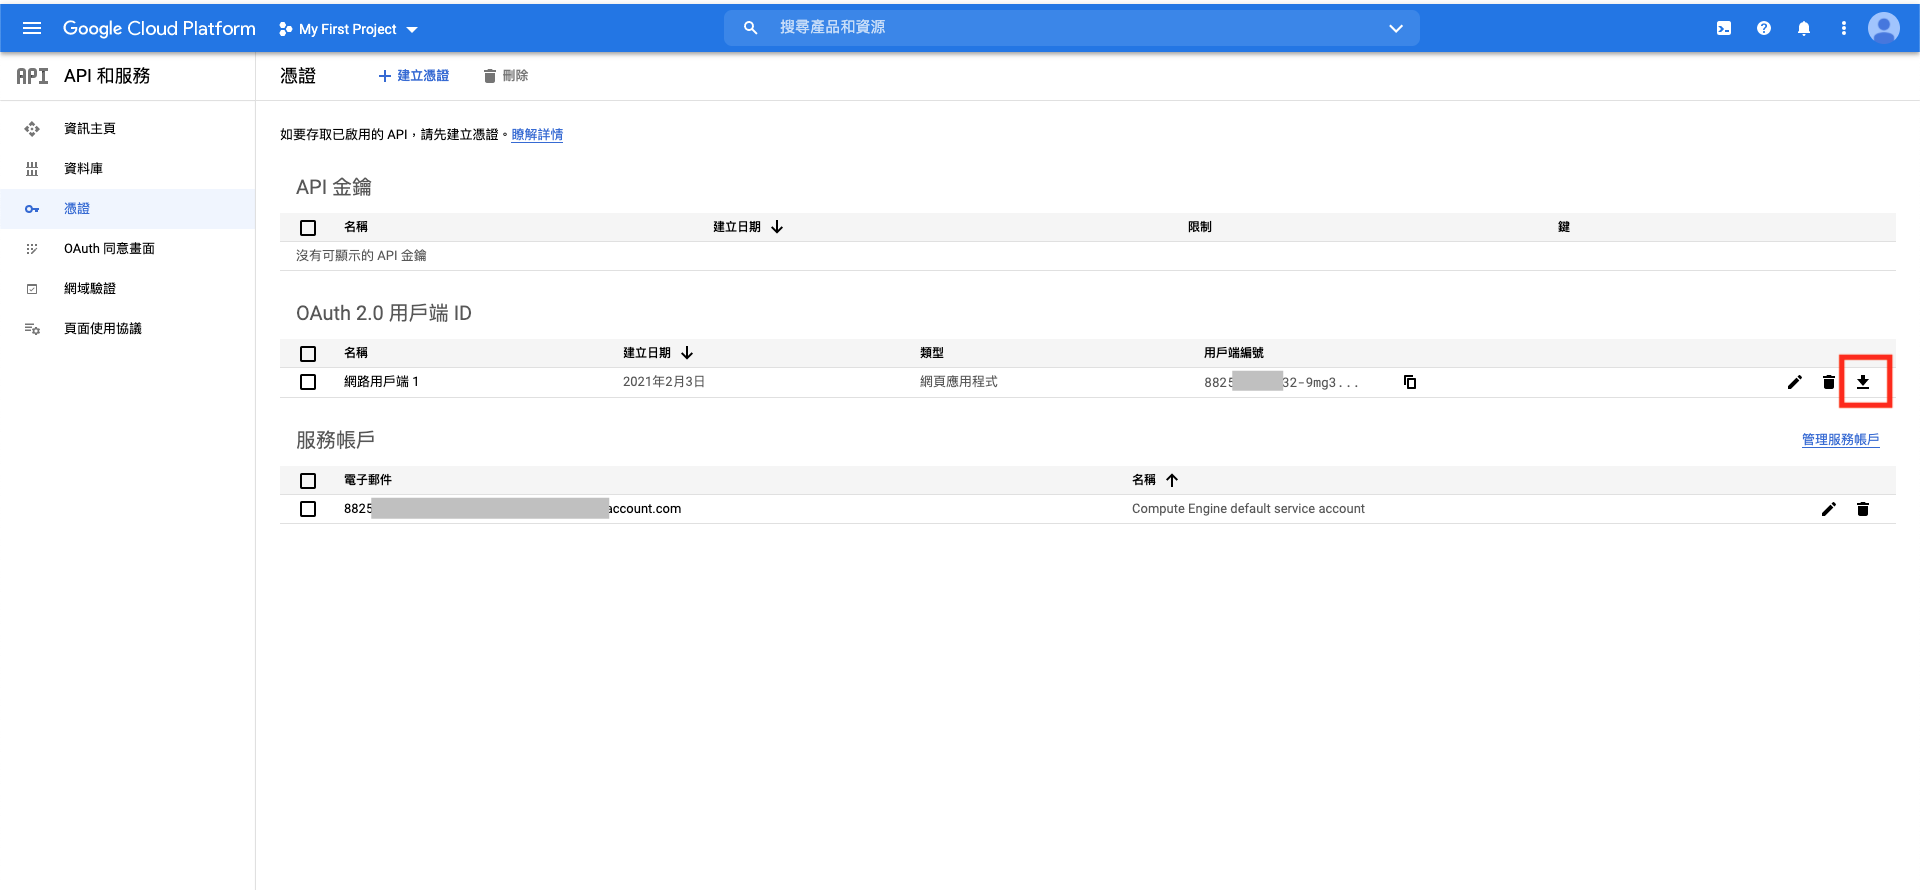
step 7
下載憑證 json回到 Google API Console 就可以看到剛剛建立的 OAuth 用戶端 ID
這邊點一下 "下載"
把它存起來 待會要用
Code 程式碼部份
step 1
依照官方文件使用 composer 安裝 librarycomposer require google/apiclient:"^2.7"
step 2
設定取得 credentials 路徑public static function AuthUrl()
{
// New 一個 Google_Client 出來
$client = new Google_Client();
// 設定剛剛下載下來的 json 檔路徑
$client->setAuthConfig('/path/to/client_credentials.json');
// 設定 callback 轉址路徑,注意這個路徑必須和上面 `step5` 的 `已授權的重新導向 URI` 路徑一致
$client->setRedirectUri(f3()->get('uri') . '/google_next');
// 設定可以 OAuth 授權的內容 以下就以最基本的 email 及 profile 資料為例
// 如果要更多資料可以參考: https://developers.google.com/identity/protocols/oauth2/scopes
$client->addScope('https://www.googleapis.com/auth/userinfo.email');
$client->addScope('https://www.googleapis.com/auth/userinfo.profile');
// 建立路徑
$url = $client->createAuthUrl();
// 接著就可以使用該路徑來 call Google Credentials
return $url;
}step 3
於 callback 路徑取得 userData照上面的流程
我們理論上就會在 callback 取得 google 回傳的 access token
因此我們就可以用這個 token 來取得 userData
public static function userData()
{
    // 前半段是一樣的
    $client = new Google_Client();

    $client->setAuthConfig('/path/to/client_credentials.json');

    $client->setRedirectUri(f3()->get('uri') . '/member/' . $url);

    // 取得 google 回傳的 access token
    $client->authenticate($_GET['code']);

    // 使用 service 物件來取得 profile 及 email
    $service = new Google_Service_Oauth2($client);
    $userData = $service->userinfo->get();

    // 完成!
    return $userData;
}
根據上面的流程
就可以成功從 Google OAuth 取得使用者資料
因而達到串接 Google 登入的效果囉!
參考資料
https://xenby.com/b/245-%E6%95%99%E5%AD%B8-google-oauth-2-0-%E7%94%B3%E8%AB%8B%E8%88%87%E4%BD%BF%E7%94%A8%E6%8C%87%E5%8D%97
https://blog.longwin.com.tw/2019/03/google-php-sdk-oauth-login-2019/
https://petertc.medium.com/oauth-2-0-196a5550b668
2 comments
感謝你的筆記,非常詳盡實用,救了我一命!
很高興可以幫助到你~